What is Staging?
The staging environment is a copy of your production website where you can preview any changes or upgrades before you apply them on your production website. This prevents any downtime or unexpected errors on your live website. Why Risk your production website when you can play safe with our Staging tool!
How our Staging Tool makes the process Easier & Efficient?
Our new Staging feature will help you create and manage staging copies with one just click. You can create staging copy of your live website to test the upgrades, install plugins, themes, add new pages or any other changes to make sure you are satisfied with the changes before pushing it to the live installation. Softaculous lets you maintain Staging as well as Production website simultaneously for any changes you would want to make in future.
Let’s take an Example of a WordPress
Softaculous will allow you to setup a staging site to either a subdirectory, or a subdomain – we would strongly recommend using a separate subdomain, such as ‘staging.yourdomain.com’ for your staging site. You must first create the subdomain through the cPanel interface, via the ‘Subdomain’ interface.Login to your control panel
- Go to your panel (e.g. cPanel’s URL will be https://domain.com:2083) and log in with your credentials
- Click on the Softaculous Icon or Link
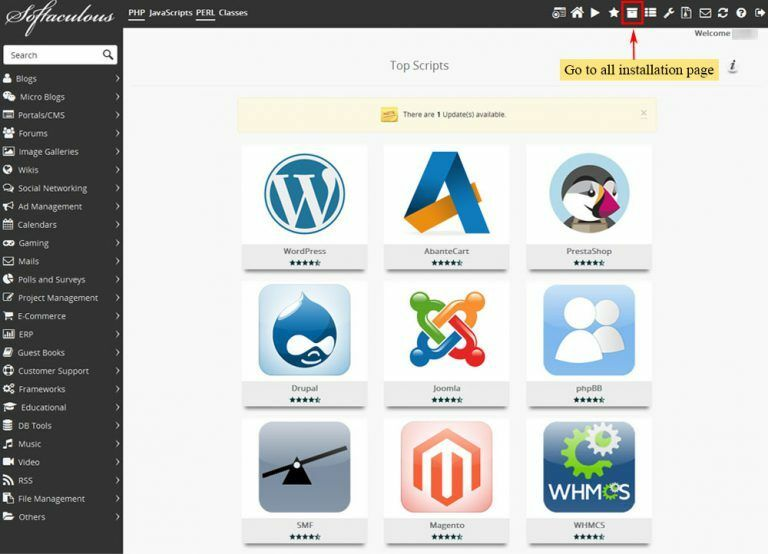
- This will take you to Softaculous Enduser Panel
- Go to the Installations page as shown in the screenshot below
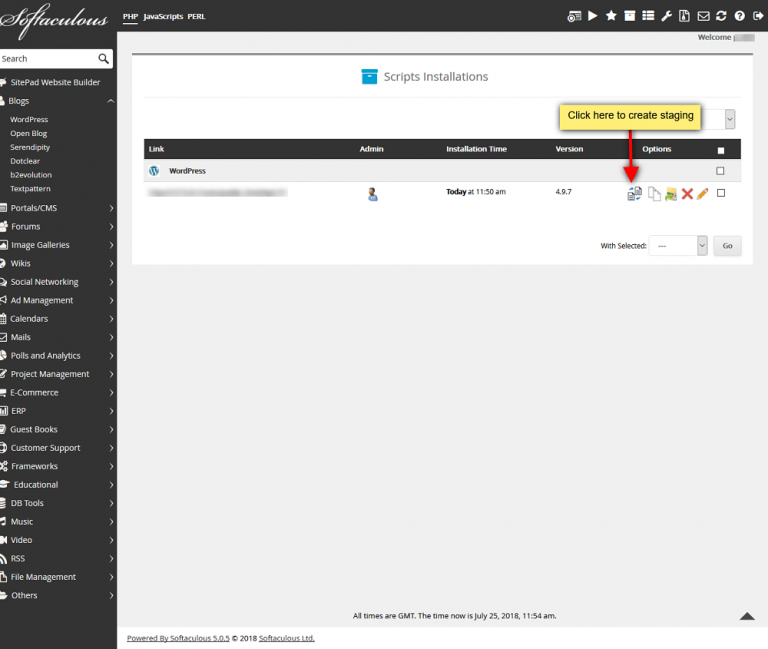
Choose the installation for which you want to create a Staging copy
Click on the Create Staging icon as shown in the screenshot below
The create Staging page will appear with the live installation details and a form asking for details about the staging copy you want to create.
Fill in the Staging Installation details as shown in the screenshot below
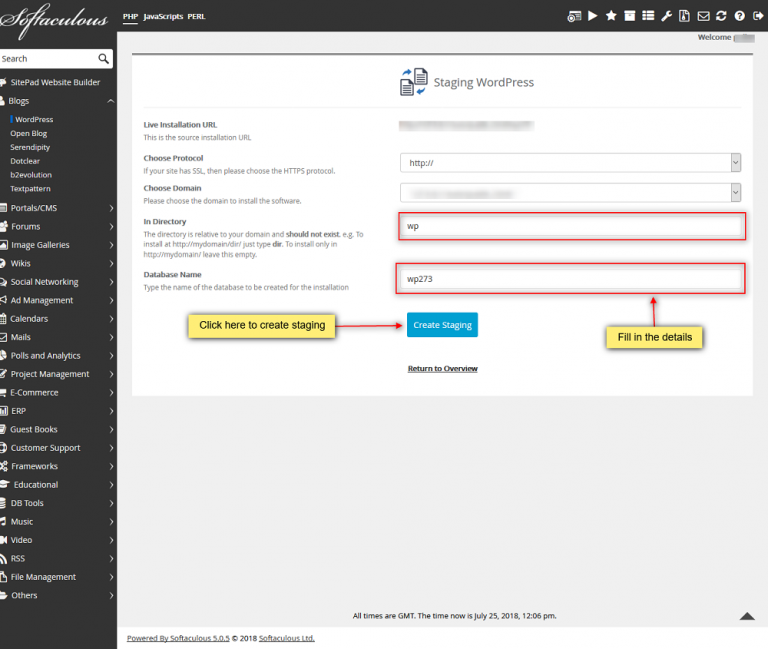
Click on the
Create Staging button and it will do the trick. That’s it!
Your staging copy is ready. You can login to the WordPress admin panel with the same credentials as in the live installation. Make any changes you need e.g. :
- Install/Update Plugins
- Install Themes
- Update WordPress Core
- Add/Edit Pages
- Any other changes you would like to make.
Once you are satisfied with the changes in Staging copy, you can now Push these changes to your live website (again with just one click).
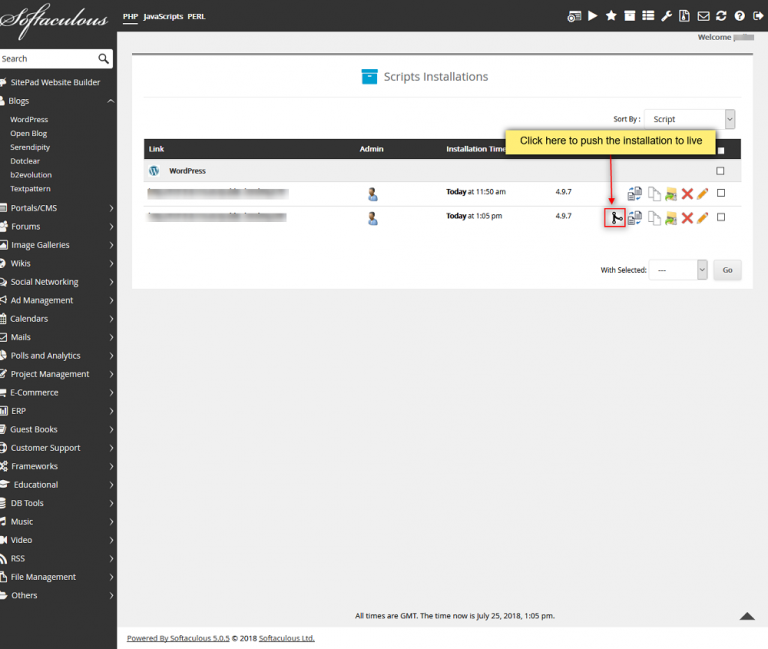
Choose the Staging installation you want to push to live
Click on the Push To Live icon next to the corresponding Staging installation you wish to push to live as shown in the screenshot below
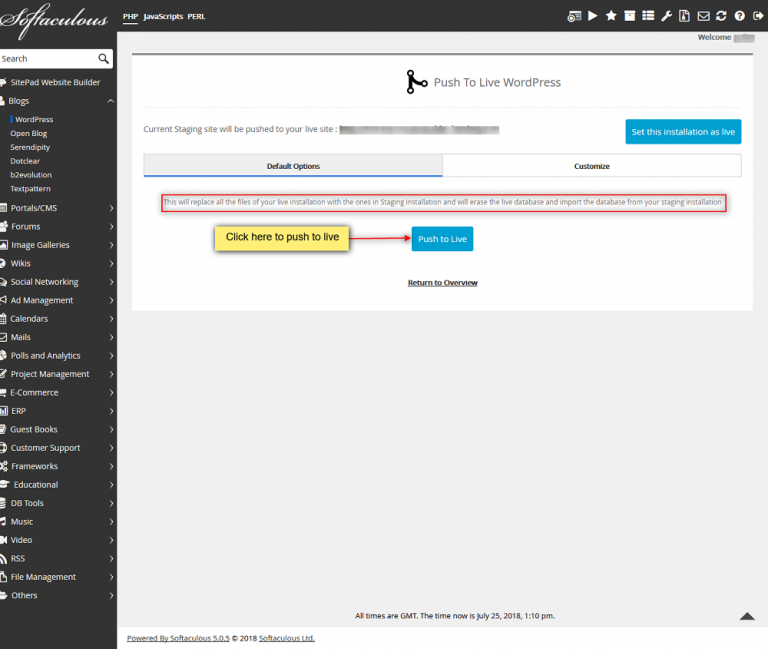
The Push to Live page will appear asking for details about how you want to merge the changes i.e. you want to just update the files or update the database as well. You will see two tabs :
Default OptionsIf you want to push the current staging website as is to your production website i.e. files as well as the exact same database. This option will
Create a backup of your live website
Overwrite all the files from your staging copy to your live installation
Erase the database of your live installation and replace it with the one in your staging copy
Customize
This option will allow you to choose exactly what changes you want to push from your staging copy to live installation. You can choose if you want to
- Push the Files
- Full Database (includes structure changes as well as rows in the tables)
- Only Database structure
- Only Data from the database tables
This option will :
Create a backup of your live website
If you choose the “Overwrite Files/Folders” the files from your staging copy will be copied to your live website
As per the option you choose it will make the changes to your database
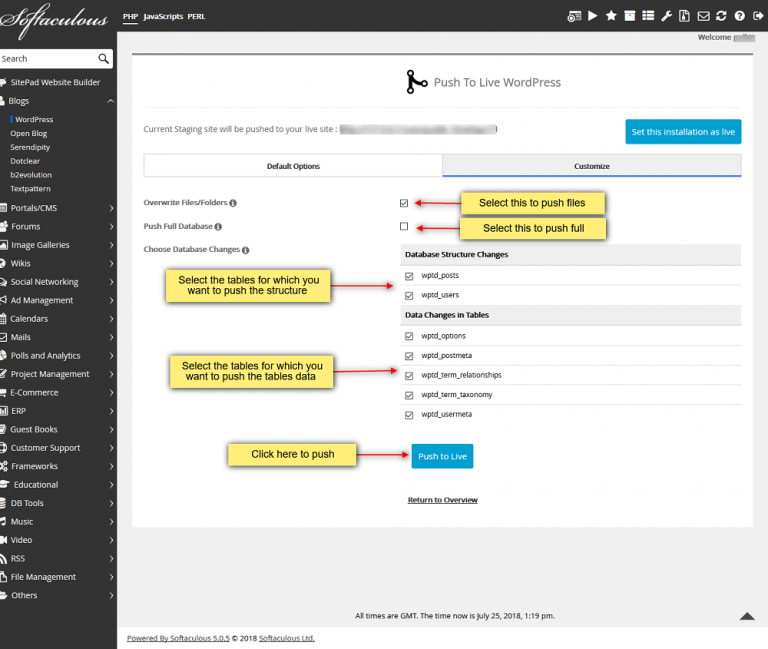
Once you have decided what changes you want to Push to your live website, hit the Push to Live button. That’s it!
Let Softaculous do the hard work. The Success message will appear and you can login to your production website and check if everything works fine.
We hope this feature helps you save time and hassle in managing your staging and live installations.